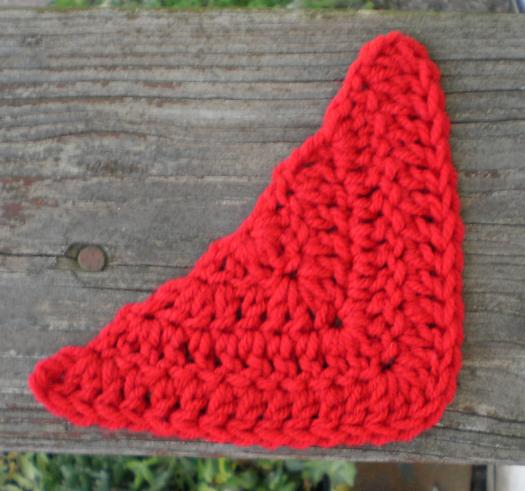
Thursday, June 10, 2010

2-D Butterfly


In honor of the 1.5 million children who perished in the Holocaust
Read more about The Butterfly Project


Materials: any weight yarn or thread (scrap amount in main color, 10 inch piece in contrasting color), hook size appropriate for yarn/thread used, tapestry needle for weaving in ends, fabric stiffener (optional)

Finished Size
Thread (shown above) with (US) size 7 steel hook: 2.5 inches x 1.75 inches (blocked)
Sport (3) with (US) size D hook: 3 inches x 2.25 inches (unblocked)
Worsted (4) with (US) size H hook: 4.75 inches x 3.5 inches (unblocked)

Special Stitches:
Picot: ch 3, sl st in 3rd ch from hook

ch 5, join with sl st in 5th ch from hook to form loop

Row 1: ch 3, dc in loop, [ch 1, 2 dc in loop] 5 times, turn. (12 dc)

Row 2: 5 dc in next ch 1 sp (shell made), shell in next ch 1 sp, sc in next ch 1 sp, shell in each of next 2 ch 1 sp, sl st in top of beg ch 3 from previous row, ch 1, turn. (4 shells)

Row 3: {dc, in next st, 2 tr in next st, (tr, picot, tr) in next st, 2 tr in next st, dc in next st} (upper wing made), sl st in sp between shells, [dc in next st, 2 dc in next st, (dc, picot, dc) in next st, 2 dc in next st, dc in next st] (lower wing made), sl st in next sc, rep between [ ] for second lower wing, sl st in sp between shells, rep between { } for second upper wing, sl st in same st as last dc made. Fasten off, weave in ends.

FINISHING

1. Measure the center most portion of your butterfly from top to bottom (where the body would normally be on a butterfly. See Fig 1.) Fold contrasting color yarn or thread in half. Wrap folded yarn around center of butterfly from back to front. (see Fig 2) Tie an overhand knot close to top of butterfly as indicated in Fig 3.

2. Making sure not to twist the loop, place the folded piece around the center of the body and pull knot through the loop. (see Fig. 4) Trim antennae to desired length.

3. Stiffen as desired.


Fig. 1


Fig. 2


Fig. 3


Fig. 4


Made with Worsted Weight (4)

Made with Sport/Baby Weight (3)
Pattern designed and written by April Moreland
© 2010 All rights reserved

Sunday, May 16, 2010

A Day at the Fair

Cyndi, Ben, and I spent this past Saturday splashing in the mud and playing with fiber! We visited the HFA Fiber Fair 2010 in Marshfield, Mo. It rained off and on most of the day but everything was in the pavilions so we stayed dry (for the most part) and had a blast! :)

We weren't there but about 3 or 4 minutes when a woman handed me a card and said, "You've won a door prize!" It was a lovely assortment of Goat's Milk bath products in a basket shaped like the state of Missouri, provided by Misty Woods ~ Home, Health, and Goat's Milk Products.


Next it was off to look at the craft tables and all the fiber goodies. There were so many gorgeous handmade items. And the yarns were so much fun to look at. I bought some hand dyed wool for Cyndi to play with:


And I got myself some pencil roving so I can try my hand at Kool-Aid dying and needle-felting:


Oh, and we picked up a couple of hot chicks too! (Pot holders) LOL


But the real reason we were there, at least as far as Ben was concerned, was to look at all the animals:

Little Lambs


Alpacas


Alpaca after shearing


And the most impressive: A lady spinning angora directly from the bunny while he's sitting on her lap. Sorry for the dark picture... the lighting was bad for that one. :(


After the fair we went up to Springfield to visit A New Yarn (my favorite LYS!) where I bought some Noro Silk Garden to make myself a new bag. :)


Well, we were exhausted when we got home but it was totally worth it! We will definitely be going to the fair again next year! :)

Wednesday, May 5, 2010

Civil War Era Shawl

A reproduction of the shawl found at: http://www.shasta.com/suesgoodco/newcivilians/womenswear/ladycoats.htm#Shawls

Finished Size: 34 inches at center point (not including fringe)

Materials: Worsted Weight Yarn; US size "H" hook; Stitch Marker; Tapestry Needle (for weaving in ends)

Ch 6, join with sl st in 1st ch to form loop.

*Note: Place marker as indicated on Row 3 to mark center ch 3 space. Move marker up each row as you work being sure to keep it in the center ch 3 sp.

Row 1: ch 5 (counts as beg ch 3 + ch 2 now and throughout), (3 dc, ch 3, 3 dc, ch 2, dc) all in same loop, turn.

Row 2: ch 5, (3 dc, ch 1) in next ch 2 sp, (3 dc, ch 3, 3 dc, ch 1) in next ch 3 sp, (3 dc, ch 2) in next ch 2 sp, dc in top of beg ch 3, turn.

Row 3: ch 5, (3 dc, ch 1) in next ch 2 sp, (3 dc, ch 1) in next ch 1 sp, [3 dc, ch 3 (*mark as center ch 3 sp), 3 dc, ch 1] in next ch 3 sp, (3 dc, ch 1) in next ch 1 sp, (3 dc, ch 2) in next ch 2 sp, dc in top of beg ch 3, turn.

Row 4: ch 5, (3 dc, ch 1) in next ch 2 sp, (3 dc, ch 1) in each ch 1 sp across to last ch 1 sp before center ch 3 sp, (3 dc, ch 3, 3 dc, ch 1) in center ch 3 sp, (3 dc, ch 1) in each remaining ch 1 sp across, (3 dc, ch 2) in next ch 2 sp, dc in top of beg ch 3, turn.

Rows 5-33: Repeat row 4, do not turn at end of row 33.

NOTE: Shawl may be made longer by repeating Row 4 until desired length.

Row 34 (top border): ch 3, (2 dc, ch 1) in end of row 33, (3 dc, ch 1) in end of each remaining row across top of shawl including the beginning loop. (102 dc)

Row 35 (bottom fringe-optional**): [ch 13, 5 sc in 2nd ch from hook, 5 sc in each of next 9 ch, ch 2] (one corkscrew made), sl st in next ch 2 sp, make corkscrew, sl st in same ch 2 sp, [make corkscrew, sl st in next ch 1 sp] across to last ch 1 sp before center ch 3 sp, make corkscrew, sl st in next ch 3 sp, make corkscrew, sl st in same ch 3 sp, [make corkscrew, sl st in next ch 1 sp] across to last ch 1 sp before laast ch 2 sp, make corkscrew, sl st in next ch 2 sp, make corkscrew, sl st in same ch 2 sp, make corkscrew, sl st in top of beg ch 3 of Row 34.

Fasten off, weave in ends

**Alternate fringe: If you prefer to use a plain fringe, (for each fringe) cut 3-5 pieces of yarn to twice the desired length and secure in ch 1 spaces with a larks head knit along bottom edge. This website has a good tutorial for making fringe in this manner.

Closeup of Row 34 (top edge)

Closeup of center

Closeup of corkscrew

One more for the road...


Pattern written by April Moreland
© 2010 All rights reserved

Solid Corner Half Square

Solid Corner Half Square

Finished Size: 5 inches X 6.5 inches on the diagonal side

Materials: Worsted Weight Yarn; US size "I" hook; Tapestry needle for weaving in ends.

ch 4

Round 1: (beg ch 3 counts as 1 dc) 7 dc in 4th ch from hook, turn.

Round 2: ch 3, 2 dc in same st, dc in each of next 2 sts, 5 dc in next st (corner made), dc in each of next 2 sts, 3 dc in

next st, turn.

Round 3: ch 3, 2 dc in same st, dc in each of next 6 sts, 5 dc in next st, dc in each of next 6 sts, 3 dc in next st, turn.

Round 4: ch 3, 2 dc in same st, dc in each of next 10 sts, 5 dc in next st, dc in each of next 10 sts, 3 dc in next st, turn.

*Note: For a larger square, continue in same manner making sure to increase 2 sts in the first and last st of each row and

to place corner in the center dc of corner from previous row.

Fasten off at end of last row, weave in ends.

Here it is laid on top of the solid square.

Pattern written by April Moreland
© 2010 All rights reserved

Solid Corner Square

Solid Corner Square

Finished Size: 5 inches

Materials: Worsted Weight Yarn; US size "I" hook; Tapestry needle for weaving in ends.

ch 4

Round 1: (beg ch 3 counts as 1 dc) 11 dc in 4th ch from hook, join with sl st in top of beg ch 3.

Round 2: ch 3, 5 dc in next st (corner made), [dc in each of next 2 sts, 5 dc in next st] 3 times, dc in next st, join with sl st in top of beg ch 3.

Round 3: ch 3, dc in each of next 2 sts, 5 dc in next st [dc in each of next 6 sts, 5 dc in next st] 3 times, dc in each of next 3 sts, join with sl st in top of beg ch 3.

Round 4: ch 3, dc in each of next 4 sts, 5 dc in next st [dc in each of next 10 sts, 5 dc in next st] 3 times, dc in each of next 5 sts, join with sl st in top of beg ch 3.

*Note: For a larger square, continue in same manner making sure to place corner in the center dc of corner from previous row.

Fasten off at end of last row, weave in ends.

Pattern written by April Moreland
© 2010 All rights reserved

Tuesday, March 30, 2010

I'm Done!

At long last the Calendar Ghan is finished!!


Now I just need to get the border instructions written up and we can call this one a done deal! WOOHOO! :)

Sunday, March 28, 2010

LYS Review

I'd never stepped foot in a LYS (local yarn store) before yesterday, not because I didn't want to, but because the opportunity had never presented itself. A New Yarn is a brand new LYS in Springfield, MO. I found them via their group on Ravelry earlier this month and knew I must visit!

WOW! is all I can say. I've heard so many LYS stories from different areas of the U.S. (both good and bad) that I really didn't know what to expect. Well there are no horror stories to be found here! I was greeted upon entering by an exceptionally friendly and helpful, but not at all overbearing, staff that obviously strives for a cozy atmousphere. I immediately felt at home.

I was on sensory overload as I perused the stunning displays of fibery goodness. The inventiveness and creativity that went into the displays is impressive. Of course there were the expected "cubbies" full of center pull skeins, and the "wall of hooks" displaying hanks ready to be wound, but what caught my eye was the display of Rowan Cotton seemingly tossed in an old washtub, the Crystal Palace Cotton Chenille arranged on an antique hutch, and even more yarn packed into a strategically opened drawer, all adding to the cozy, homey feeling.

Their spacious layout lends to the comfortable atmousphere. I could have easily strolled Ben around if necessary without feeling like the displays would come crashing down. I was in such awe of the yarn and displays that I almost didn't notice the comfy seating area. I could just picture a group of ladies sitting and talking about the week's events while knitting or crocheting. Such fun!

Much to my amazement, I only walked out with one skein of yarn. I bought a ball of Crystal Palace Yarn's Cotton Chenille in Bubblegum Pink. I've been wanting to play with this yarn ever since I saw the Reverse-Bloom Flower Washcloth in Weekend Knitting a few years ago. I have a few projects I need to wrap up, but I will definately be playing with the chenille soon!


I regret not planning my trip a little better. I really should have made a list of my current WIMs and the proposed fibers for those projects. I knew I needed some feltable wool but had not a clue as to my color needs. I stood there looking at their huge display of Cascade 220 feeling a bit overwhelmed. I know I could have asked for help, and it would have been given without hesitation, but with no idea of the direction I wanted to take with my color effect, it would have been frustrating for both of us. :(

The stress was all in my own head though. I felt rushed because I knew Cyndi and Ben were waiting anxiously in the car for me so we could grab some lunch. But even with feeling rushed, I had a blast petting all of the amazing yarn that I've only seen on the internet or in magazines.

Thank you A New Yarn for providing me with a wonderful shopping experience. The yarns are fabulous and the prices are easy on the wallet. I'm already planning my next shopping trip, and next time I will make sure I have plenty of time to explore!

If you're ever in the area, pay them a visit and tell them DishclothDiaries sent you! Even if you don't knit or crochet, it's definitely worth the trip just to see the colorful and inventive displays alone! :)

Thursday, March 25, 2010

Calendar Ghan Joining Instructions


**It was my original intention to do a photo tutorial of the joining method, but Ben decided to "play" with the camera so it is not operating to capacity at the moment(it won't focus properly) so doing a step by step photo tut was out of the question. I will get better pics of the finished ghan up ASAP. In the meanwhile, if you have any questions please leave a comment here. I will do my best to answer!


Materials: US size "I" hook, worsted weight yarn (Soft White was used for example), tapestry needle for weaving in ends

NOTES:
1: December's Mistletoe square has some ch 1 sps on the outermost row. When joining this square each ch 1 sp will count as one stitch.
2: Each of the Calendar 'Ghan squares have 37 stitches along each side PLUS the corner ch 2 sps. If the squares you are using do not have 37 sts you will need to do a row of sc around each square, increasing or decreasing as necessary to bring them all to the proper st count.
3: Alternately, these joining instructions may be used for any square so long as each side (not including the corner ch sp) has a stitch count that is a multiple of 3, + 1. Please note that you will need to adjust the number of repeats of the instructions in the brackets if using with a square other than one that has 37 sts on each side.

ABREVIATION NOTE:
S1 = Square 1 (you will only make one of these)
S2 = Square 2 (joined only on one side)
S3 = Square 3 (joined on two sides)
SA = Square A (when joining S1 and S2 this is the square facing you)
SB = Square B (when joining S1 and S2 this is the previously worked square behind SA)
SC = Square C (when joining S1 and S3 this is the next previously worked square behind SA)

*Use the Layout Chart below for square placement

Square 1: With right side facing, join yarn with sl st in any corner ch sp of square, (ch 3, dc, ch 3, 2 dc) in same sp, ch 1, skip next st, [dc in each of next 2 sts, ch 1, skip next st] 12 times, *(2 dc, ch 3, 2 dc) in next corner ch sp, ch 1, skip next st, [dc in each of next 2 sts, ch 1, skip next st] 12 times, rep from * twice more, join with sl st in top of beg ch 3, fasten off.

Square 2 (one sided join): With right side facing, join yarn with sl st in any corner ch sp of square, (ch 3, dc, ch 3, 2 dc) in same sp, ch 1, skip next st, [dc in each of next 2 sts, ch 1, skip next st] 12 times, (2 dc, ch 3, 2 dc) in next corner ch sp, ch 1, skip next st, [dc in each of next 2 sts, ch 1, skip next st] 12 times, (see abreviation note above) holding wrong sides together, on SA work 2 dc, ch 1 in next ch 2 sp, sl st in corner ch 3 sp on SB, ch 1, 2 dc in same ch 3 sp on SA, sl st in next ch 1 sp on SB, [(skip next st, dc in each of next 2 sts) on SA, sl st in next ch 1 sp on SB] 12 times, skip next st on SA, 2 dc in next corner ch sp on SA, sl st in corner ch 3 sp on SB, ch 1, 2 dc in same corner ch sp on SA, working on SA for remainder of square, ch 1, skip next st, [dc in each of next 2 sts, ch 1, skip next st] 12 times, join with sl st in top of beg ch 3, fasten off.

Square 3 (two sided join): With right side facing, join yarn with sl st in any corner ch sp of square, (ch 3, dc, ch 3, 2 dc) in same sp, ch 1, skip next st, [dc in each of next 2 sts, ch 1, skip next st] 12 times, (see abreviation note above) holding wrong sides together, on SA work 2 dc, ch 1 in next ch 2 sp, sl st in corner ch 3 sp on SB, ch 1, 2 dc in same ch 3 sp on SA, sl st in next ch 1 sp on SB, [(skip next st, dc in each of next 2 sts) on SA, sl st in next ch 1 sp on SB] 12 times, on SA work 2 dc, ch 1 in next ch 2 sp, sl st around joining slip st previously joined squares, ch 1, 2 dc in same ch 3 sp on SA, sl st in next ch 1 sp on SC, [(skip next st, dc in each of next 2 sts) on SA, sl st in next ch 1 sp on SC] 12 times, skip next st on SA, 2 dc in next corner ch sp on SA, sl st in corner ch 3 sp on SC, ch 1, 2 dc in same corner ch sp on SA, working on SA for remainder of square, ch 1, skip next st, [dc in each of next 2 sts, ch 1, skip next st] 12 times, join with sl st in top of beg ch 3, fasten off.


Square Layout Chart


Back to CAL Main Page

Pattern designed and written by April Moreland
© 2010 All rights reserved

Sunday, March 21, 2010

Coming Soon!

Many of you have been asking about the joining and border intructions for the Calendar Ghan. I know I've fallen to the wayside on this, but I just wanted to let you all know I haven't forgotten about it.

I haven't even put my own squares together yet. BUT I have put it on the agenda for this week and will be developing the details, with photos, and will have the joining instructions up later this week!

Saturday, March 20, 2010

The Wonders of Ravelry

I have been spending a lot of time on Ravelry lately. I joined quite a while back but have only recently begun to really learn my way around the site. I've added lots of projects to my projects page as well as many of my free patterns from here on the blog to my designer's page.

Feel free to look me up and add me as a friend. I'm DishclothDiaries over there too. :)

A quick preview of a few of my newly added projects:

A couple of grannyghans for charity...

My roaming gnome I made just for me :)

Cyndi's "Crocheting Crab" that I made for
Ben to give her for Mother's Day last year.

And my own mini version of the popular
bearghan. This one is made baby doll sized. :)

Monday, March 15, 2010

Charity Crochet

Somewhere along my travels today I came across this link: Carewear.org

They have a database of hospitals and various other organizations that accept handmade donations. You can look at the entire list or search by state. They also offer free patterns for you to make baby items for charity.

I encourage you to look up your home state and find a hospital or other organization and donate something that they are in need of. It will make you feel good, I promise! :)

Sunday, March 14, 2010

Chainless Crochet

Dislike that unsightly seam created by the ch 3 while working in the round? Or the uneven edge when working in rows? Well TXCr1cket has a solution! She has several videos on her You Tube Channel that eliminate the need for the chain stitch.

How cool is this? Have a look:

Friday, March 12, 2010

Seed Stitch Charity Cowl

*This pattern has NOT been tested. If you find any mistakes please leave a comment here and I will correct.
Also, I don't have a pic to post just yet, so if you work this up and would like to share a link to a pic in the comments section it would be greatly appreciated!

MATERIALS
(US) size H hook
1 skein Caron Simply Soft yarn; Blue Mint (or desired color)
tapestry needle

GAUGE (worked in seed st)
15 sts = 4 inches
14 rows = 4 inches

FINISHED SIZE
Adult-One Size Fits Most (9 inches tall X 26 inches around)

SPECIAL STITCHES & TECHNIQUES
"back hump" of starting chain: Turn your starting chain over so the back is facing you, notice the single strand in the middle of the chain forms a "hump". Your stitches will be worked into that hump. For more info see: http://www.stitchdiva.com/custom.aspx?id=191
(This method for working into the starting chain gives a more finished look to the beginning edge of your work. If you are uncomfortable with this method, the traditional method of working into the starting chain may be used.)

FPdc (front post double crochet): yo, from the front, insert hook around the post of the corresponding dc of the previous row, yo and draw up loop, yo, draw through 2 loops, yo, draw through 2 loops.

BPdc (back post double crochet) = yo, from the back, insert hook around the post of the corresponding dc of the previous row, yo and draw up loop, yo, draw through 2 loops, yo, draw through 2 loops.

Closing the beginning chain: Thread tapestry needle with the tail from the beginning ch, working on opposite side of starting chain, insert needle on right side and under free loops of 2nd dc made in round 1, pull snug but not tight (it should look like the top of a sc) and secure end at base of first ch of starting chain.

leaving 6 - 8 inch long tail, ch 106, do not join (See note above)

Round 1: working in the back hump of starting chain (see note above) dc in 4th ch from hook and in each ch across, join with sl st in top of beg ch 3. (104 sts)

Rounds 2-4: ch 3, work FPdc in next st, (work BPdc in next st, work FPdc in next st) around, join with sl st in top of beg ch 3.

Round 5: ch 1, sc in same st, dc in next st, (sc in next st, dc in next st) around, join with sl st in beg sc.

Round 6: ch 3, sc in next st, (dc in next st, sc in next st) around, join with sl st in beg ch 3.

Rounds 7-26: Repeat rounds 5 and 6.

Round 27: ch 3, dc in each st around, join with sl st in top of beg ch 3.

Rounds 28-30: Repeat rounds 2-4, fasten off. Close beginning ch. (see note above) Weave in ends.

Saturday, March 6, 2010

Friday, March 5, 2010

Here Comes Peter Cottontail

Today is bright, sunny, and warm. I hope Spring has finally sprung! We had entirely too much cold and bad weather this year. I'm ready for some color! Spring Fever has definately set in, and here's my proof:

The bunny I came up with on my own...
But I'm sure you recognize these guys:

Mama chicken and her baby pastel chicks were a staple in our house when I was little. I hadn't thought about them in years until a friend wanted me to make her some recently. This is what I came up with:

I have the patterns written and will post them tomorrow. Hope you enjoy!! :)

Thursday, March 4, 2010

Knitting Daily

I watched a tv show today that kind of took me by surprise. I had set the DVR on a whim a few days ago when I saw the title. The show was Knitting Daily. The episode was #110: All About Texture. Although I do knit, my expertise in that area is pretty much limited to simple dishcloths and other simple projects. So I thought what could it hurt, I might learn something new. And learn something new I did, but not about knitting!

I was happy to see that the show is crochet friendly! Kim Werker, billed as their "Crochet Ace," is one of the regulars on the show. On today's episode she met with Robyn Chachula who showed her a different kind of double crochet stitch. It is called a "Linked Double Crochet" (abreviated Ldc). It creates a more solid fabric that is great for wearables. She used the stitch when designing her Rosemary Sweater which was featured in the fall 2007 issue of Interweave Crochet. Robyn is also offering a free download of the Rosemary Sweater via the Knitting Daily webiste.

In addition to the crochet segment, they talked about different yarns and thier textures. Even though the information was primarily geared toward kitters, I think there was much to be learned by crocheters as well. After all, yarn is NOT knitting exclusive! I will definately be watching Knitting Daily on a regular basis.

If you want to check it out, it's on PBS. You can look for the show in your area on the Knitting Daily website.

Wednesday, March 3, 2010

Another History Lesson

I promise to keep this one brief! I just wanted to follow up a bit on my previous posts about George Washington Carver and antique patterns.

Undoubtedly, one of the most popular, as well as historical, crochet items that was ushered into the new millennium has been the shawl. Many Prayer Shawl Ministries have emerged in the past decade or so in an effort to provide comfort and emotional support to those experiencing hardship and loss. What once was worn primarily as a garment of necessity, has become one of comfort and support.

I thought it would be fun to re-create a Civil War Era Shawl and share the pattern with everyone for your ministries, personal use, or participation in Civil War Reenactment. Keep an eye out for the pattern within the next week. In the meanwhile, here's a sneak preview:


For more details about the history of crochet, Ruthie Marks has provided a wonderfully detailed historical timeline of crochet. It is posted at Crochet.org. (opens as a PDF)

Tuesday, March 2, 2010

National Women's History Month

Yesterday I talked about National Crochet Month, well March is also National Women's History Month. What started just a few decades ago as International Women's Day, has evolved to encompass a full month dedicated to educating students of all ages about the importance of women throughout history.

This year's theme is Writing Women Back into History. Although it may be politically incorrect in today's society, it is a fact, historically speaking, that crochet and most other needlewark was primarily seen as "woman's work". Antique Pattern Library is working to preserve the the art form by making available the many patterns our foremothers used during the 19th and early 20th centuries.

Included in the library are crochet, knitting, tatting, embroidery, needle lace and other kinds of needlework patterns. No matter your needleart of choice, you will surely find something there that will help you give you a sense of needleart history.

Monday, March 1, 2010

History Lesson

March is National Crochet Month. The origin of crochet often falls under scrutiny. Some believe men may have been among some of the first crocheters during the early centuries, others say there's no evidence of the artform until the 19th century when it was popular with European women of the day. In more recent times though, history has come full circle with men finally reclaiming their niche in the world of crochet.

During the mid to late 20th century, crochet was beginning to be seen as the pastime of "old ladies." It was mocked, berated, and seen as inferior in the world of fiber art. During the 21st century however, it has become a modern and hip way of expressing ones creative spirit. From amigurumi to the classic granny afghan, crochet is making its mark on the new millennium in a very postive way.

Perhaps its current popularity can be attributed, at least in part, to some modern day celebrities who lend their name to the enjoyable hobby. One of the first names that comes to mind is that of Vanna White. From pattern books, to her own popular line of yarn, her name has helped to revitalize the once jeered art form.

While Vanna may just be the most well known woman in crochet, the most celebrated "dude" associated with crochet is not who you might think. Yes, Drew Emborsky most certainly is The Crochet Dude, but the identity of an earlier male fiber fiend may just surprise you.

He was born a slave in 1864, just before the abolition of slavery, in what is now Diamond, Missouri. In the absence of his natural mother, his owners, Moses and Susan Carver, raised him as their own. Susan not only taught him in his youth to read and write, she also taught him to crochet. Historically, he is best known as the man who discovered 300 uses for the peanut.

Have you guessed who he is yet? I'm sure you have.

Yes, George Washington Carver was a crocheter!

You can catch a glimpse of him with his handiwork at approximately 1:45 into the following video:


Stay tuned for more on this subject!

Tuesday, February 23, 2010

My New Hair Stick

Never let a 2 year old near your Blogger account! I just logged onto Ravelry and happened to notice my recent blog posts and thought to myself, "when did I post that?" I've removed the post, but if you missed it, it was just a link to a silly pattern I am making for a swap. I'll share the results when I've finished and it's happily in its new home. :)

Onto some other silliness:

My hair has been getting a bit long these days and I don't like it hanging on my neck unless the temps are cold, so during the couple of warm days we had last week I wanted to put it up but couldn't find a scrunchie. This is how I improvised... It stayed there all day and didn't budge!

Friday, February 19, 2010

What's In A Name?

I've been thinking it's time for another change around here...

When I updated the look of this blog a while back I had also considered a name change, but at the time thought it prudent to hang onto the Dishcloth Diaries label. I didn't want to confuse or lose anyone. All the links people have bookmarked to thier computers, not to mention the links on Ravelry, CPC, my sidebar... Yes, I was (and still am) feeling selfish for not wanting to change all of that.

But when it comes right down to it, Dishcloth Diaries just doesn't seem appropriate any longer. The name no longer represents me or the purpose of this blog. I haven't had a dishcloth on my hook or needles in quite a while, and well... I'm just plain getting bored with the name.

I've been trying on a few ideas just for fun. Let me know what you think!
It's Crochet By Me. (A play on the phrase "it's okay by me")

April's Crochet Palette. (If it works for my Yahoo! group it will work for my blog, right?)

The Left Side of Crochet. (One: because I'm left handed. And Two, because I think it sounds fun and quirky ;)

The Blog Formerly Known As Dishcloth Diaries (Nah... just kidding! LOL)

I still don't know if I'll actually do this. I do have one possible solution for the bookmarks/links/etc... I could just leave the URL as is and just change the name only. Hmmm... something to think about.

Wednesday, February 10, 2010

Whoosh!

This year is whooshing by. I can't believe it is the second week of February already! It seems like it was just yesterday that I was promising new patterns and griping about New Year's Resolutions.

With all the inclement weather, the school closings, and just the general disarray I've been feeling very scattered. The weather has completely disrupted my routine. Laundry didn't get done today, the recycling is piling up, so are the puffies that need to go to the post office. I know my swap partners will understand if they are a little late, but it still stresses me to see them sitting here.

There are so many tasks that desperately need to be accomplished. Designs to be worked out, patterns to be written, WIPs & UFOs to be finished, and TONS of things around the house; cleaning, organizing, etc... I tried to make a to-do list but became overwhelmed by the enormity of the task.

And then, this past Saturday, on top of everything that's been stressing me, my Norton's 360 decides to take an undeserved vacation and allows a virus into my computer! Long story short, I ended up having to run my boot disks. Arrgh! I'm just glad I keep everything backed up on my flash drive!! It was a major pain in the rear, and took most of the weekend, but at least everything is back to normal now. At least with the computer anyway...

And now for just a little bit of eye candy...
Some Valentine Fridgies I made for a swap

Friday, January 15, 2010

College Bound!

For the past several months I've been looking at my profile blurb and thinking to myself, "I really need to change that... I'm not a student anymore." But I really dreaded the thought of un-labeling myself a student.

When we first arrived here in Missouri my last semester at AACC had just ended. I was still in school mode... I couldn't wait to get back in the classroom. But I would need to wait a year to gain residence status, or be subject to the high tuition costs. I truly worried that my desire to finish my education would wane, and for a while it seemed like that is exactly what would happen.

But today I picked myself up by the bootstraps as it were, filled out FAFSA, ordered my transcript from AACC, and filled out my college application. I will be starting MSU in August 2010!!

I'm very excited, and very proud. :)

"GO GRIZZLIES!"

Sunday, January 10, 2010

Getting there...


UPDATE: Mistletoe is finished!!

Well I've finally posted a portion of the December square! YAY! LOL

I worked on it all afternoon and evening but think I finally have the design worked out and know where it's going. My brain is too tired to finish it tonight, but I should have the remainder posted by tomorrow evening. Have fun!!

Mistletoe Square

Oh yeah... almost forgot... I updated the Flower Garden square. It is now correct and measures 12 inches. I'm sorry for any problems this square has caused everyone!

Saturday, January 2, 2010

I Hate New Year's

Yes, I hate New Year's. There, I've said it! I hate it for all it's worth. I hate the noise. I hate the fireworks. I hate the hurrah. But most of all, I hate the disappointment.

At 12 years old, all I could wish for on New Year's Eve was to kiss a boy. And of course there was never one to be found. At least none that I cared to kiss. I should note here that I would have settled for ANY boy so long as he was near my age. Cuteness would have been a plus, but certainly not a necessity.

I don't know why I thought New Year's Eve was more important than any other day for a first kiss. Perhaps it was an instinctual need for renewal. Leaving the old behind, starting anew, a symbolic rebirth at the cusp of adulthood if you will. Whatever the reason, assuredly there was an extreme and needful desire to feel loved. An emotion that was scarce during my childhood.

Hidden away in my bedroom, behind closed doors, I escaped into my fantasy world many a late December afternoon. I played the scene in my mind a million times over. Just at the stroke of midnight our lips would meet in the perfect innocent kiss. Glittery confetti would rain down. We would be oblivious to the music, noise, and excitement all around us. We would ring in the new year with love and we would live happily ever after. It was just a silly girlish fantasy, but it was my fantasy and I was determined to live it.

It would be another four years before I would realize the dream though. Or at least some semblance of it. There in front of our best friend's mother, the dog, and Dick Clark, my dream was at long last a reality. But dreams aren't always meant to come true. That awkward kiss, and all it stood for, has only led to disappointment in the many years since.

The lack of glitter. The absence of fanfare. Ultimately it's brought me to a nasty realization.

I am a liar.

I tell untruths.

I don't lie to other people. Well not usually, not if I can help it.

No, I lie to myself.

I lie about how long it will take me to accomplish tasks. "I can have that afghan finished in 3 days." "I can clean this room in an hour." "I'll just check my email real quick."

I lie about when I will accomplish tasks. "I will vacuum after lunch." "I will take the the plastic to the recycling center tomorrow." "I will clean the junk room this weekend."

I lie about what tasks I will accomplish. "I will organize all of my yarn." "I will finish all my WIPs before starting another one." "I will start eating healthier this year."

I lie about the things I won't do. "I will not buy more yarn until I use what I have." "I will not leave the dishes in the sink overnight." "I won't care if you eat that chocolate cake in front of me."

But most of all, I lie about what I want for myself. My intentions are always good. "I want to get married." "I want to change jobs." "I want to buy a house." But in the end those wants lead to disappointment in one way or another.

Because of my lies I no longer make New Year's resolutions. In the past I would start out with the best of intentions. "This will be the year I loose all that weight. I'll show everyone next Christmas!" And when next Christmas comes around not only am I still my old fat self, I'm now depressed for not having met my goal. Even if I was the only one who knew of it.

So no more lies.

Nope.

None.

Nada.

I know at the end of the year I will look back, as I do every year, and think of those resolutions I didn't make; The dreams I didn't wish; The lies I didn't tell. And it will occur to me there is no escape. Whether I admit it to myself or not it is ingrained in me to wish for something better. A new start. A new life. And what time of year could be more appropriate to wish for a new beginning than the turning of the calendar? The epitome of symbology for renewed hope.

And as tempting as hope is, I resist.

And I remain a liar.

Tuesday, December 29, 2009

Slowly Recovering...

First of all I must apologize to you all for my extended absence. I honestly didn't mean to be away for this long. I know I still owe you all a square to represent December, and I will work on that and get it published soon, I promise. ;)

So what have I been doing all month? *sigh* Where to start?

December was especially stressful this year. I don't usually let the craziness of the season get to me so early in the month. I usually wait until the very last minute to totally freak out. LOL

Thanksgiving was the turning point. The reality of what little time there was left for gift making suddenly hit me, and this year making as many gifts as possible was essential since I don't currently have an income. And besides, that's what I bought all that yarn for! (I did use a good bit of it too.)

I was crocheting like a madwoman all month. I made afghans, amigurumi, hats, scarves, and all kinds of other things for friends and family. Almost none of which I thought to take pictures of. Arggh! I hate that about myself. :( I did take a picture of a Kermit I made, but the camera's batteries are currently dead so I'll have to share a picture of him next time...

Although I was still putting the finishing touches on Kermit at 2am Christmas morning, I did manage to get everything finished and wrapped in time. But there always has to be something that throws a wrench into the whole deal and this year was no different. The coup de grĂ¢ce was the nastiest stomach bug you could ever wish NOT to encounter. It ripped it's way through the family one after another. It was like watching dominoes fall.

Son in law brought it home from work on the 23rd. From there, Ben had it by Christmas eve, Cyndi on Christmas day, Matthew (my son) on Saturday, and just when I had made a joke about being the "Last Man Standing"... I fell... I woke up Sunday morning with it and am just now getting my appetite and energy back. Cyndi joked about the ordeal saying, "Well at least we saved a bundle on groceries this week!" Gotta try to find the humor in there somewhere! :)

To try to keep this post from getting too boring, I think I'll give you a sneak peek of some things that you will be seeing sometime within the next few weeks/months from me. I still need to write patterns, but these are a few things I made a while back that I plan to share...

Some small stuffies...


More dishcloths...


And for the knitters and seal lovers...


And of course I have tons of WIPs and UFOs that I need to get back to. Including my pink button project, the bright grannieghan, Son in Law's camo-rippleghan, a knitted ghan that's been on the needles for 2 years (YIKES!) that I've resolved to finish this year (bigger YIKES!!), baby booties, adult & children's granny-style hats, fudge recipe, and lots of other ideas and patterns and cool fun stuff that's still trapped in my sorry little mind trying to break free. I'll get to them all eventually. Thanks for hanging in there with me! :)

Wednesday, December 2, 2009

Mistletoe

Finished Size: 12 inches square

MATERIALS
Approx. 4 ounces worsted weight yarn (Honeydew used for example)
US size "I" hook
Tapestry needle for weaving in ends

Gauge: Rnds 1-3 = 4 1/2 inches

SPECIAL STITCHES:
v-st: (dc, ch 1, dc) in designated space

ch 4

Round 1: 15 dc in 4th ch from hook, join with sl st in top of beg ch 3. (16 dc)

Round 2: ch 4 (counts as beg ch 3 + ch 1), dc in same st, ch 1, sc in next st, ch 1, (v-st in next st, ch 1, sc in next st, ch 1) 7 times, join with sl st in top of beg ch 3. (8 v-sts, 8 sc)

Round 3: sl st into next ch 1 sp, ch 1, sc in same sp, ch 4, (sc in next v-st, ch 4) 7 times, join with sl st in beg sc. (8 ch 4 sps, 8 sc)

Round 4: sl st into next ch 4 sp, ch 1, 5 sc in same sp, ch 1, skip next sc, (5 sc in next sp, ch 1, skip next sc) 7 times, join with sl st in beg sc. (40 sc, 8 ch 1 sps)

Round 5: ch 1, sc in same st, sc in next st, tr in next st, sc in each of next 2 sts, v-st in next ch 1 sp, (sc in each of next 2 sts, tr in next st, sc in each of next 2 sts, v-st in next ch 1 sp) 7 times, join with sl st in beg sc. (8 v-sts, 8 tr)

Round 6: ch 1, sc in same sp, sc in each of next 4 sts, skip next dc, 3 sc in next ch 1 sp, skip next dc, (sc in each of next 5 sts, skip next dc, 3 sc in next ch 1 sp, skip next dc) 7 times, join with sl st in beg sc. (64 sc)

Round 7: sl st in each of next 2 sts, ch 1, sc in same st, skip next st, dc in each of next 2 sts, v-st in next st, dc in each of next 2 sts, skip next st, sc in next st, skip next st, (dc in each of next 2 sts, v-st in next st, dc in each of next 2 sts, skip next st, sc in next st, skip next st) 7 times, join with sl st in beg sc. (8 v-sts)

Round 8: ch 4 (counts as beg ch 3 + ch 1), skip next st, dc in next st, ch 1, skip next st, [v-st in next ch 1 sp, ch 1, skip next st, (dc in next st, ch 1, skip next st) 3 times] 7 times, v-st in next ch 1 sp, ch 1, skip next st, dc in next st, ch 1, join with sl st in top of beg ch 3. (8 v-sts)

Round 9: ch 3, (dc in next ch 1 sp, dc in next st) twice, *(2 dc, ch 2, 2 dc) in next ch 1 sp, (dc in next st, dc in next ch 1 sp) 3 times, hdc in next st, ch 2, skip next ch 1 sp and next st, sl st in next ch 1 sp, ch 2, skip next st and ch 1 sp, hdc in next st**, (dc in next ch 1 sp, dc in next st) 3 times***, rep between * and *** twice more, repeat between * and ** once more, dc in next ch 1 sp, join with sl st in top of beg ch 3. (64 dc, 8 hdc)

Round 10: ch 2, dc in each of next 6 sts, *(2 dc, ch 2, 2 dc) in next ch 2 sp, dc in each of next 6 sts, hdc in next st, sc in each of next 2 sts, 2 sc in next ch 2 sp, sc in next st around the sl st and into the v-st from round 8, 2 sc in next ch 2 sp, sc in each of next 2 sts**, hdc in next st, dc in each of next 6 sts***, rep between * and *** twice more, rep bet * and ** once more, join with sl st in top of beg ch 2. (64 dc, 36 sc)

Round 11: ch 4 (counts as beg ch 3 + ch 1), skip next st, dc in each of next 3 sts, ch 1, skip next st, dc in each of next 3 sts, *(2 dc, ch 2, 2 dc) in next ch 2 sp, (dc in each of next 3 sts, ch 1, skip next st) 6 times, dc in each of next 3 sts, rep from * twice more, (2 dc, ch 2, 2 dc) in next ch 2 sp, (dc in each of next 3 sts, ch 1, skip next st) 4 times, dc in each of next 2 sts, join with sl st in top of beg ch 3. (100 dc, 24 ch 1 sp)

Round 12: sl st into next ch 1 sp, ch 1, sc in same sp, sc in next st, tr in next st, sc in next st, sc in next ch 1 sp, sc in next st, tr in next st, sc in each of next 3 sts, *(sc, ch 2, sc) in next ch 2 sp, sc in each of next 3 sts, (tr in next st, sc in next st, sc in next ch 1 sp, sc in next st) 6 times, tr in next st, sc in each of next 3 sts, rep from * twice more, (sc, ch 2, sc) in next ch 2 sp, sc in each of next 3 sts, (tr in next st, sc in next st, sc in next ch 1 sp, sc in next st) 4 times, tr in next st, sc in next st, join with sl st in beg sc. (104 sc, 28 tr)

Round 13: sl st in next st, ch 3, dc in each of next 2 sts, ch 1, skip next st, dc in each of next 3 sts, ch 1, skip next st, dc in each of next 2 sts, *(2 dc, ch 2, 2 dc) in next ch 2 sp, dc in each of next 2 sts, ch 1, skip next st, (dc in each of next 3 sts, ch 1, skip next st) 7 times, dc in each of next 2 sts, rep from * twice more, (2 dc, ch 2, 2 dc) in next ch 2 sp, dc in each of next 2 sts, ch 1, skip next st, (dc in each of next 3 sts, ch 1, skip next st) 5 times, join with sl st in top of beg ch 3. (116 dc, 32 ch 1 sp)

Back to CAL Main Page

Pattern designed and written by April Moreland
© 2010 All rights reserved

Friday, November 27, 2009

Taming the Peanut Butter Fudge

Our family's only true heirloom recipe is Grammy's Peanut Butter Fudge. It has been a holiday staple since Grammy was a child herself. She tells us she learned how to make it from her brothers who would make it often. She's not sure who they learned it from. Nevertheless, the holidays just wouldn't be worth celebrating without a big plate sitting on the counter for us to gorge ourselves on at will.

Knowing this, one might think this octogenarian (84 to be exact) would acquiesce to sharing her long guarded recipe to at least one trusted family member. Nope. Oh she pretends to share the recipe. She'll readily share a list of ingredients, but the amounts she gives are so vague, and the directions so twisted, that even the most revered chef would have difficulty producing an appetizing result.

Grammy's Fudge Recipe (and the dialog that ensues) verbatim:

2 parts sugar
1 part Pet milk
Skippy peanut butter
Hershey's Cocoa Powder if you want chocolate

"How much peanut butter?"

"Oh, I don't know. I just put a spoonful in there."

[*Scratching head*] "Spoonful?"

"Yeah, a spoonful."

"What size spoon?"

"The big one I use to make fudge."

See what I mean? LOL

I've since figured out that her "fudge spoon" is a serving spoon taken from her old stainless serving set. But that doesn't really mean anything as far as measurements go because she doesn't actually measure with it. She just uses it to dip big globs of peanut butter out of the jar.

One other little thing I picked up is she always fails to mention that you need to reconstitute the milk; so it's actually 1/2 part Pet milk + 1/2 part water. I don't know if that would actually make a difference in the way it turns out, but I know in her mind it does.

You see, Grammy genuinely prides herself on the fact that no one is able to duplicate her results. She brags each year that neither Aunt Peggy nor my mother could ever get their attempts to turn out right. I truly think she wants to take the recipe with her to the grave.

But then I came along... >:) *evil grin*

It's been about 20 years or so since I first asked her to show me how to make the fudge. At the time she almost seemed anxious, eagerly sharing her "secrets." For instance: you MUST use a heavy aluminum pot, you MUST use Pet milk, you MUST use Skippy peanut butter, and here's the key to her satisfaction... a candy thermometer is NOT accurate enough, only the cold water method will do.

Of course these are her own superstitions. Although the specific brands may affect taste, they most likely won't affect whether or not the fudge sets up properly. And most certainly a candy thermometer is way more accurate than the cold water method, and that is why it's the key to her satisfaction. How many people these days are familiar with the cold water method? That's why candy thermometers were invented after all; because of the uncertainty of other methods. But I was there to learn, so I tried to watch as she did her "thing."

I say tried because she kept doing things while my back was turned! She wouldn't let me measure anything. She would just show me quickly and dump it in the pan before I could assess how much of each ingredient she was actually using. And forget a re-do. Oh no no no. Once is enough. But I got one over on her.

After she had everything in the pot for chocolate fudge, she turned it over to me. I prepared the tray for the finished fudge. I buttered it, then added some nuts and marshmallows. I thought she was going to have a heart attack. "It won't work, you're going to ruin it," she insisted.

I ignored her as I stirred, and stirred, and stirred. Checked for soft ball stage, and then stirred some more. Finally I called it done. She must have told me 30 times that it wasn't going to set up. "Now it's going to take at least 10 or 15 tries until you get it to set up right." Oh boy was she LIVID when it set up perfect. I was elated! But it wasn't a true victory. I still didn't know the ingredients list.

I asked her a couple of years ago to show me again how to make it. "I'm measuring as we go and writing everything down this time," I said. She reluctantly agreed. But when I came home from work on the night she was supposed to show me, there it was sitting on the table... cooling... Grrr!

I guess she was still holding a grudge for my past success. But she wouldn't even show Cyndi when she asked to watch next time. Yeah, she most definitely wants to take that recipe to the grave! Why are people like that about recipes? I'm proud to share my favorite recipes! *sigh*

Now I, being a culinary school genius (not really, but I did take 2 years of Food Services in High School... that counts, right?), have decided to go on a quest. The quest for duplicating Grammy's fudge. She's given me more than enough clues over the years, and with my (slightly) better-than-average skills in the kitchen, I trust in myself that I can do this!

I've been meaning to do it for years. Take it upon myself to duplicate, measure, and record this recipe once and for all. I guess I was being lazy in hopes that she would finally give in and let me take the easy road to fudgy goodness. Oh well... here goes!

Sugar: check
Pet Milk: check
Peter Pan Peanut Butter -- I'm a rebel, what can I say!: check
Hershey's Cocoa -- Cyndi wants chocolate: check
Heavy Pot: Not aluminum, but oh well! check
My very own "fudge spoon": check

Wish me luck!